|
QuickTip #8: What is a Good or a Bad History Log Entry?
In the "Status and Progress Information" section at the bottom of a project page, you will find some history log entries. Some of these are automatically entered by the system when there is a significant action for the project, some other history log entries are entered by the project partners as needed. This is an excellent way to log in a central location the latest information about a project. If you are dealing with many projects, you will just have to go back to a project page to find out what its current status is. To make good use of this feature you will need to remember to make these entries whenever needed.
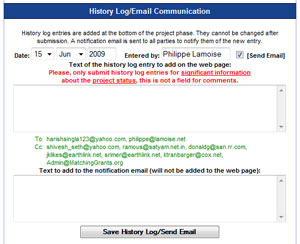 You create a new history log entry from the "History Log/Email Communication" section of the administration page. On top of the section you select the date of the entry, and type your name. Then you have 2 fields to enter some text. The top field (below the red text) is for the text that is going to be added to the project page. So you want in there only the significant information about this step. The text should not be too long. Just one or two sentences, straight to the point. The bottom field (below the green text) is NOT going to be added to the project page, but will be added to the notification email sent to the project partners. So this is where you can add some specific instructions, maybe assign a specific task to somebody.
In addition to recording the history log entry on the project page, a notification email is sent to the project partners. This will be sent to all the people included in the distribution list displayed in green between the two text fields. This distribution list includes the project main project partners, and the people listed in the online application form. People can be added and removed using the fields and buttons at the bottom of the section.
Examples of Bad History Log Entries
- Our Project is looking for funding. Duh! We could not figure this out!
- Copying and pasting an entire email from TRF. This is way too long. The essence of the email should be summarized in one or two sentences. Straight to the point.
- John, please send the pro-forma invoice to TRF. This sentence should be sent by email through the bottom field of the history log tool, not logged on the website. See correct entry below.
Examples of Good History Log Entries
- $4,000 contribution from Torrey Pines sent to TRF. Add a history log entry each time some money is sent to TRF. This way the other partners will know that this has been done, and that your club is not holding up the payment process.
- Project on hold because of missing report from project #xxxxx. By logging the project number for the missing report, you will be able to go to the project page later to remember which report is holding up the process, and you will be able to search the Matching Grants website for this project number and get the status information if this project is also listed on this website.
- Pro-format invoice sent to TRF. To echo the bad entry above, it is correct to make this entry when the action is done, not when we ask somebody to do it.
Check out the following projects for some good examples of history log entries: D-715, or D-1110.
QuickTip #7: How to Upload Photos on your Project page?
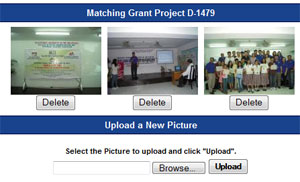 At the bottom of the administration page you will find a "Picture Administration" link in the "Upload Pictures" section. Click on this link and you will see a page with 2 sections. The top section shows the photos that are currently displayed on your project page. The bottom section lets you browse for a photo on your computer to upload it to the website.
To upload a photo, click the "Browse" button and select the photo on your computer. This needs to be a file in the JPG format. Then click on the "Upload" button. You can upload up to 9 photos (one at a time). When you already have 9 photos for your project, you will no longer see the upload fields, and you will need to make some room by deleting one of the existing photo to be able to load some new photos. To delete an existing photo, just click the "Delete" button under the photo in the top section.
Once uploaded, the photos are displayed with thumbnails on your project page, under the description text. Clicking on a thumbnail will bring a popup window with a bigger version of the photo. Photos are resized automatically by the website to fit within 800x800 pixels.
QuickTip #6: What are the various Project Statuses?
From start to completion, a project on the Matching Grants Website goes through various statuses. Here is some information on each of them. Note that you can search by status on the Search Page, and sort the lists by status by clicking on the "Status" heading on top of the list of projects.
1. Proposed
A project has the status of Proposed when it is first submitted to the Matching Grants Website using the online form. A "Proposed" project already has its dedicated page, but is not displayed on the list of projects.
2. Looking for Funding
After the project is reviewed and approved by the Website Administrator, its status is changed to Looking for Funding. This means it is displayed on the list of projects with Need $x,xxx in the status column.
3. Fully Funded
Once all the funded has been identified for the project, and has been correctly entered in the project page (QuickTip #5), the status is automatically changed to Fully Funded. This means that you can no longer make a pledge for the project, and the project partners are supposed to work on the application form to send to The Rotary Foundation.
4. Pending Approval
Once the paperwork has been sent to TRF, the project status should be changed to Pending Approval. Note that you have to change the status yourself by clicking on the "Paperwork Sent" button on the administration page. Please do not click the "Paperwork Sent" button unless the paperwork has really been sent to The Rotary Foundation. Clicking the button will automatically enter a History Log Entry, and notify all the project partners by email.
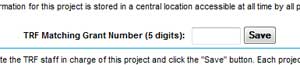 Once the project status has been changed to "Pending Approval", a field will appear on the administration page to enter the Matching Grant number you will receive from The Rotary Foundation. Any further communication with TRF should include this 5-digit number, not the number from the Matching Grants Website. You will receive some automatic reminder emails from the system as long as the TRF Matching Grant number is not entered on the website. This is to make sure the project page is properly updated, and that the project is following the approval process. The TRF Matching Grant number is added to the project page, and you can use the Search function to find a project with its TRF Matching Grant Number.
5. Approved
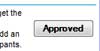 Once you receive the official approval notice from The Rotary Foundation, the project status should be changed to Approved. Note that you have to change the status yourself by clicking on the "Approved" button on the administration page. Please do not click the "Approved" button unless you have received the official approval notice from The Rotary Foundation. Clicking the button will automatically enter a History Log Entry, and notify all the project partners by email. We recommend that you upload to the Matching Grants Website the Announcement Letter in PDF format that you have received from The Rotary Foundation. This way all the project partners will be able to access this document from anywhere, 24/7.
6. Completed
 For completion of the project, you need to send the Final Report to The Rotary Foundation, and receive a Closure Letter confirming that the report has been accepted. After receiving the Closure Letter, the project status should be changed to Completed. Note that you have to change the status yourself by clicking on the "Completed" button on the administration page. Please do not click the "Completed" button unless you have received the Closure Letter from The Rotary Foundation. Clicking the button will automatically enter a History Log Entry, and notify all the project partners by email. We recommend that you upload to the Matching Grants Website the Final Report and the Closure Letter in PDF format. This way all the project partners will be able to access this document from anywhere, 24/7. "Completed" projects stay on the Matching Grants Website forever, as a testimony of your achievements.
QuickTip #5: How do I Modify the Proposed Financing?
The information displayed on the Printable Online Application Form is coming from whatever information is currently displayed on the Project Page. It is very important to keep this information up-to-date. It is only when all the contributions have been entered that the project status changes to Fully Funded and that you can drive the project through the approval process.
 To update the Proposed Financing you need to click on the "Edit Project Page" button on the administration page (QuickTip #1), and go to the "Proposed Financing" section (see on the right).
You can update the amounts for the current clubs and districts listed. At the bottom, you can add a contribution for another club or District (one by one). If you need to add more than one club or district, save the page with the first one, then go back to enter another one. If you need to remove a club or district, just enter an amount of "0" and they will not be listed.
You can also change the Total Amount for the project in the field on the top right. If you enter the "=" sign in this field, the system is going to calculate the total amount corresponding to all the contribution, but be careful using this, because this is going to change your project status to "Fully Funded" if it was not already listed like that.
QuickTip #4: Is this Website only to find Project Partners?
 No! This website is also very useful to:
- Help you fill the paperwork online, and generate the application form to send to TRF.
- Communicate by email between the project partners (the website takes care of the distribution list for you).
- Keep track of the current status of the project through the history log entries.
- Have a repository of project documents (application, announcement letter, agreement forms, reports, etc.) accessible by all project partners 24/7.
- Have a testimony of your club's achievement through the project page that stays on indefinitely. Click here to see an example of a testimony page for my Rotary Club.
All these extra features can be discovered on your own, or will be described in details in future QuickTips.
I get from time to time requests to remove a project from the website after they have found their funding. Doing so would deprive you from all these other advantages. Think twice before you confirm the request to be removed.
QuickTip #3: Yearly Cycle
 All projects on the Matching Grants website are listed for a given Rotary year (July 1 to June 30). This is the year of approval for Approved projects, or the current year for projects still looking for funding. By default, the current year projects are listed in the main project list, but you can click on the "Prev Year" button to look at projects from previous years. The search feature also gives you the option to search for all the years, or for any given Rotary year.
After March 31 on any given year, since projects can no longer be sent to TRF for approval, projects still looking for funding have to be carried over to the next year if they want to stay listed on the website.
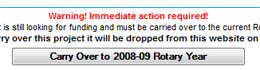 This is done by pushing the "Carry Over to 20xx-xx Rotary Year" button on the administration page of the project. Reminder emails with detailed instructions are sent to all project partners every 2 weeks from April 1 to August 1, and failure to take action by August 1 will cause the project to be dropped from the Matching Grants website.
All this is to make sure the list of projects on the website only contains current projects, and we have not lost contact with the project partners for any given project.
Once a project has been approved, it will stay listed on the website indefinitely.
QuickTip #2: Project Passwords
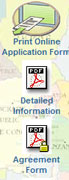
Some of the project information is protected with a password: the Administration Page, the Online Application Form, but also the supporting PDF documents other than "Detailed Information", and "Budget Information". This is because these pages and documents contain some private contact information that should not be released to the general public. Each project has a different password, and all the project partners can have access to the passwords for their own projects.
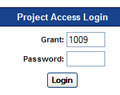 When trying to access a password-protected page or document you might be redirected to a Login Page asking for the password. If you know the password, just type it in and click the "Login" button, this will give you access to the page or document.
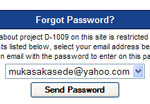 If you don't know the password you can request to have it sent to you by email provided your email address is listed as one of the project participants. To receive the password by email, select your email address in the "Forgot Password?" section of the Login Page, and click "Send Password". If your email address is not listed in there and you believe you should have access to this project, you need to ask one of the project partners to add you to the list of participants for this project. This is done at the bottom of the "History Log/Email Communication" section of the administration page.
There is also a special link at the bottom of each notification email sent about a project, this link will give you direct access to the Administration Page without having to type in a password. Once you have accessed the administration page for a given project, your computer will remember that you have access to this specific project and you will not have to type the password for this project on this specific computer (unless you wait for a long period of time without accessing the project administration page). You will have to type the password however if you use a different computer.
QuickTip #1: Updating Your Projects
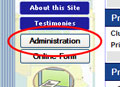 From your project page you can click on the "Administration" button on the left, under the navigation menu. This will being you to your project Administration Page. If you are asked for a password, see QuickTip #2 below. There is also a direct link to the Administration Page at the bottom of all the notification emails you receive from the website.
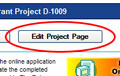 On the top right of the Administration page you can click on the "Edit Project Page" button to make changes to your project page. You can make changes to the Project Description, to the contact information for the Primary Host Partner or the Primary International Partner, and to the Proposed Financing. At the bottom of the "Proposed Financing" section you can add some contributions from clubs or districts (one at a time). If you add contributions this way instead of using the "Pledge Support to this Project" button, the contributions are added without sending a notification email, and without adding a history log entry. To remove a club contribution, just change the corresponding amount to zero.
Click the "Save" button once you have made the changes, and your project page will be updated accordingly. Note that you might have to "Refresh" the project page on your web browser to see the changes, as an old version of the page might be cached into your computer memory.
|